Wednesday, December 31, 2014

In the Last Year

I hope everyone has been having a wonderful holiday!  I've been away from my computer the last two weeks.   One week was visiting family and having Christmas fun, the other week sick in bed and not so fun.  I am glad to be up and about finally, and, despite no snowy white Christmas, I am enjoying seeing the sun shining outside.

Looking back over the last year, I am impressed at how much we've done and how much the garden has changed.  This was our first full year at our new house, and we've worked to make it ours and make it a home.

In the front I planted a mailbox garden,


sowed lots of flower seeds,

Nicotiana
and enjoyed seeing seeing the growth of some of the plants we had put in last year.

Hibiscus 'Cranberry Crush'
The biggest changes, however, have been made to our back yard.  It was completely empty until... 

we built a veggie garden,


we built a low retaining wall next to the house, making our future shade garden,


and, in what is probably the most exciting thing to happen to the Red House Garden ever, we got a greenhouse.


Whew!  I'm tired just thinking about all we've done this year and am almost glad for a winter break (though I know by the end of February I'm sure I'll be thinking an entirely different thing).  How about you guys?  Has your garden changed a lot this past year?

I wish you all a happy and healthy New Year, wherever you may be!


May love and laughter light your days,
and warm your heart and home.
May good and faithful friends be yours,
wherever you may roam.
May peace and plenty bless your world
with joy that long endures.
May all life's passing seasons
bring the best to you and yours!
~old Irish blessing

Friday, December 19, 2014

MI Squirrels - Boston Division

Boston Division's MI Squirrel Team Leader's Report:

When Mrs. Red House moved in to this sector, we received the full report from the MI Squirrel Division down near Raleigh, NC.  After reading their report, I thought our mission of breaking into her bird feeder would be one of the hardest challenges of my career.

Now I find that thought laughable.

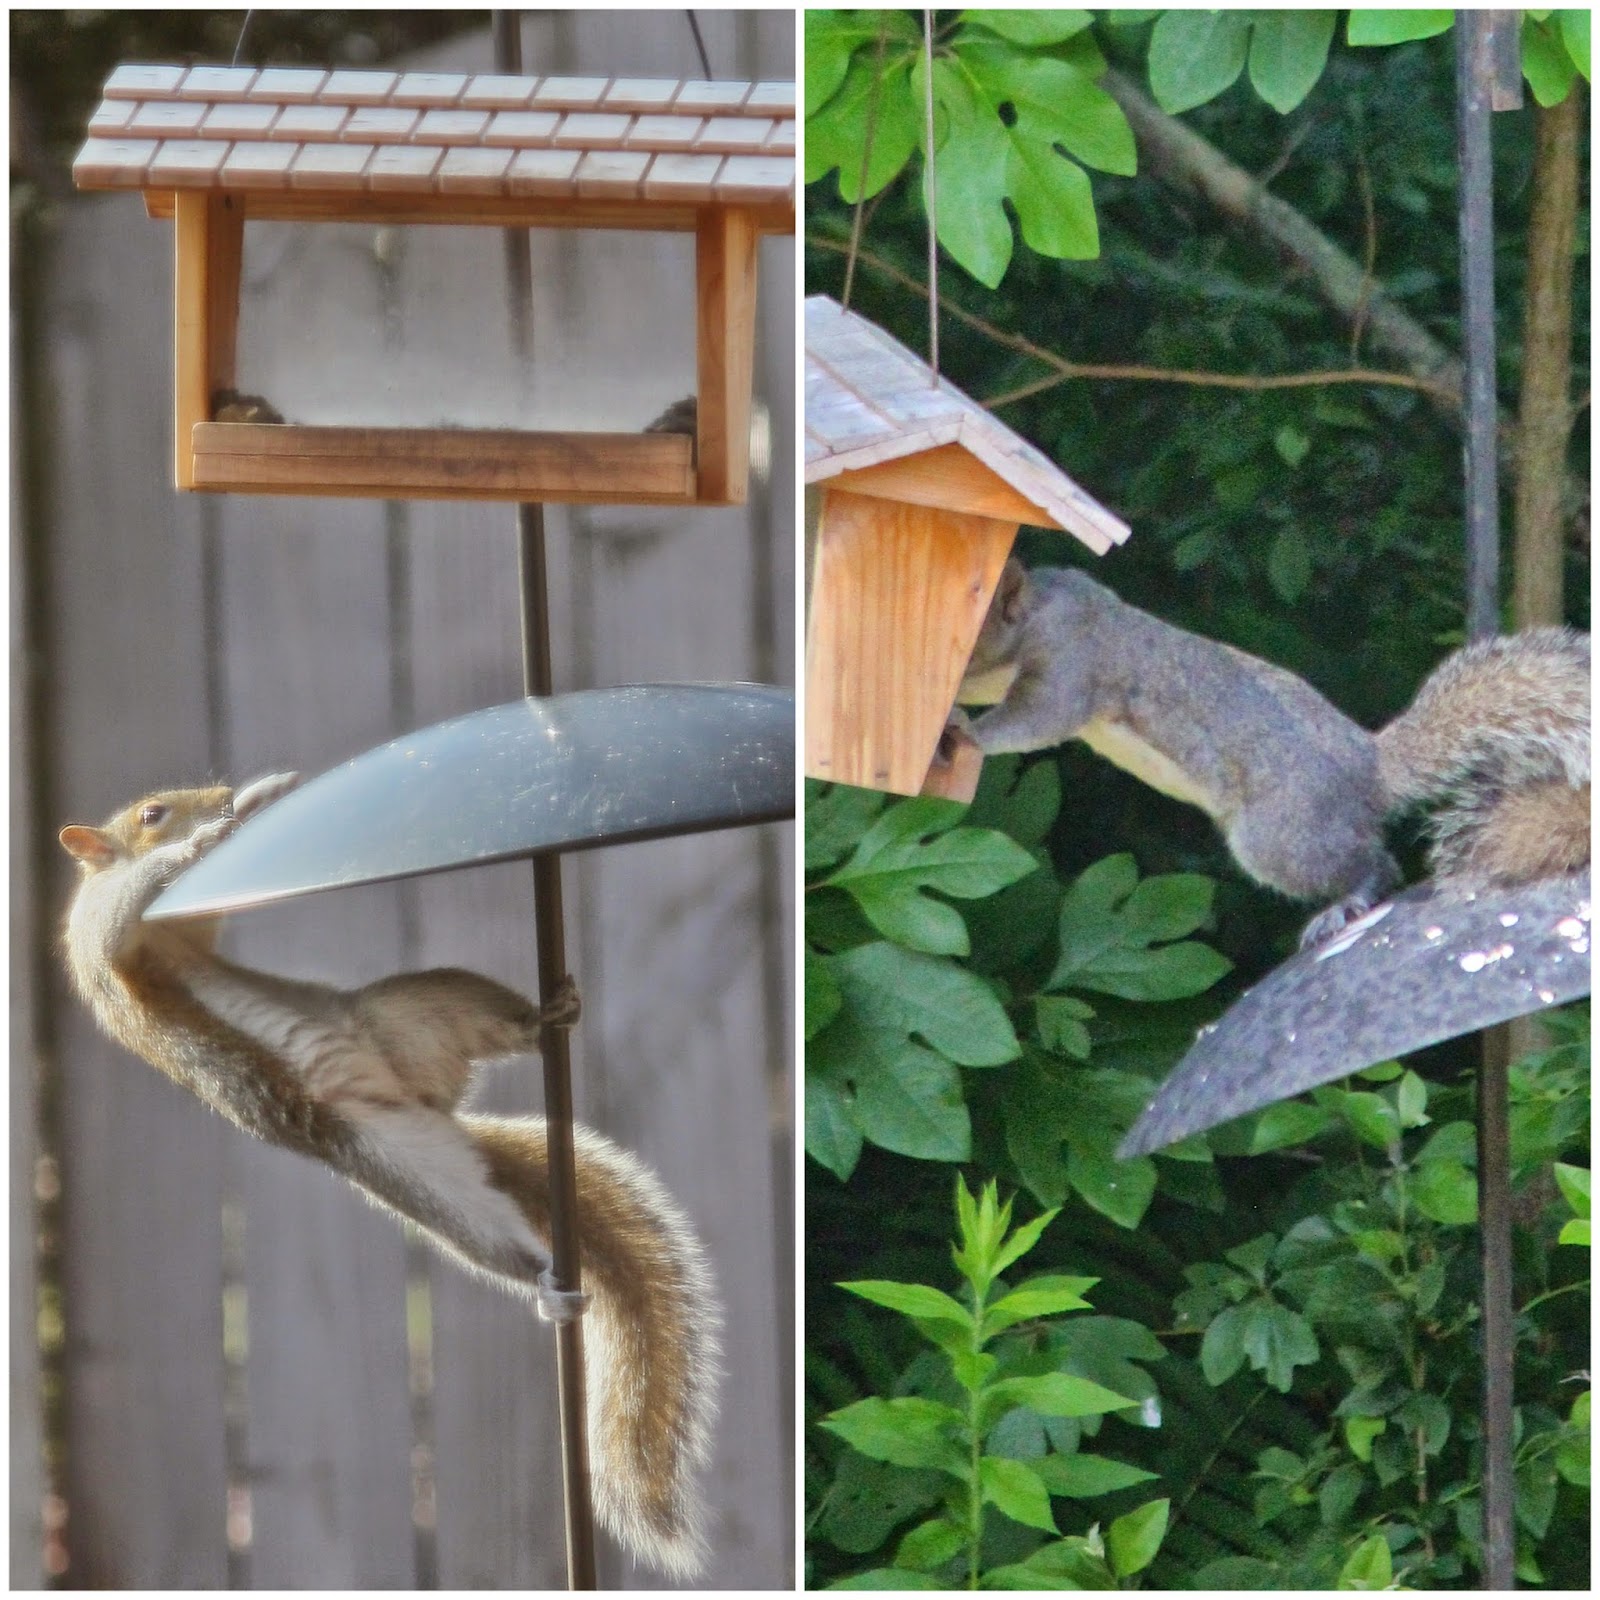
We have found Mrs. Red House's supposed 'baffles' to be completely un-baffling.  I only regret that my entire team is putting on too much weight.  Thanks to Mrs. Red House, all of us squirrels are getting entirely too fat.


What can I say?  Either my team is just that well trained
...or that team down in North Carolina are all idiots.

MI Squirrel Division of Raleigh  vs.  MI Squirrel Division of Boston

I'm looking forward to a nice, quiet holiday season....
oh, wait, what is this?  Another report?


You've intercepted Mrs. Red House's letter to Santa? 
And she asked for WHAT for Christmas??!

You may acquire your very own Squirrel Practice Targets from various Etsy stores!
Houston, we may have a problem.  


Calling all team members, get down off those bird feeders!
Time to whip you back into running shape, STAT!

Aww, man!

To see past mission reports, click on the topic Mission Impossible: Squirrel Division.

Thursday, December 4, 2014

How to Overwinter Tender Bulbs, Tubers, Corms, and Rhizomes

When I lived down South in zone 7, I rarely ever lifted bulbs for the winter unless I wanted to move them or share them.  I was usually able to get away with piling extra winter mulch on top of tender bulbs and that would get them through, even if they were only hardy to zone 8.

Calla Lily, hardy to zone 8, overwintered in zone 7 with protective winter mulch
Now I'm up North, though, and, sadly, extra mulch just doesn't cut it.  Those tender bulbs (or corms, or tubers, or whatever they might technically be named) have to be lifted and packed away for winter storage and then replanted next spring.  Here are my steps for lifting and storing them:

1.  After the first good frost, cut off the browning foliage and carefully dig up the bulbs, avoiding bruising them.  Gently brush off excess dirt.

Digging up Gladiolus murielae corms
2. Dry in a warm, well-ventilated place for a couple of days.  Corms such as Calla Lily, Crocosmia, Freesia, Gladiolus, Tigrida, and Tritonia need to cure in a warm place for longer, about three weeks.


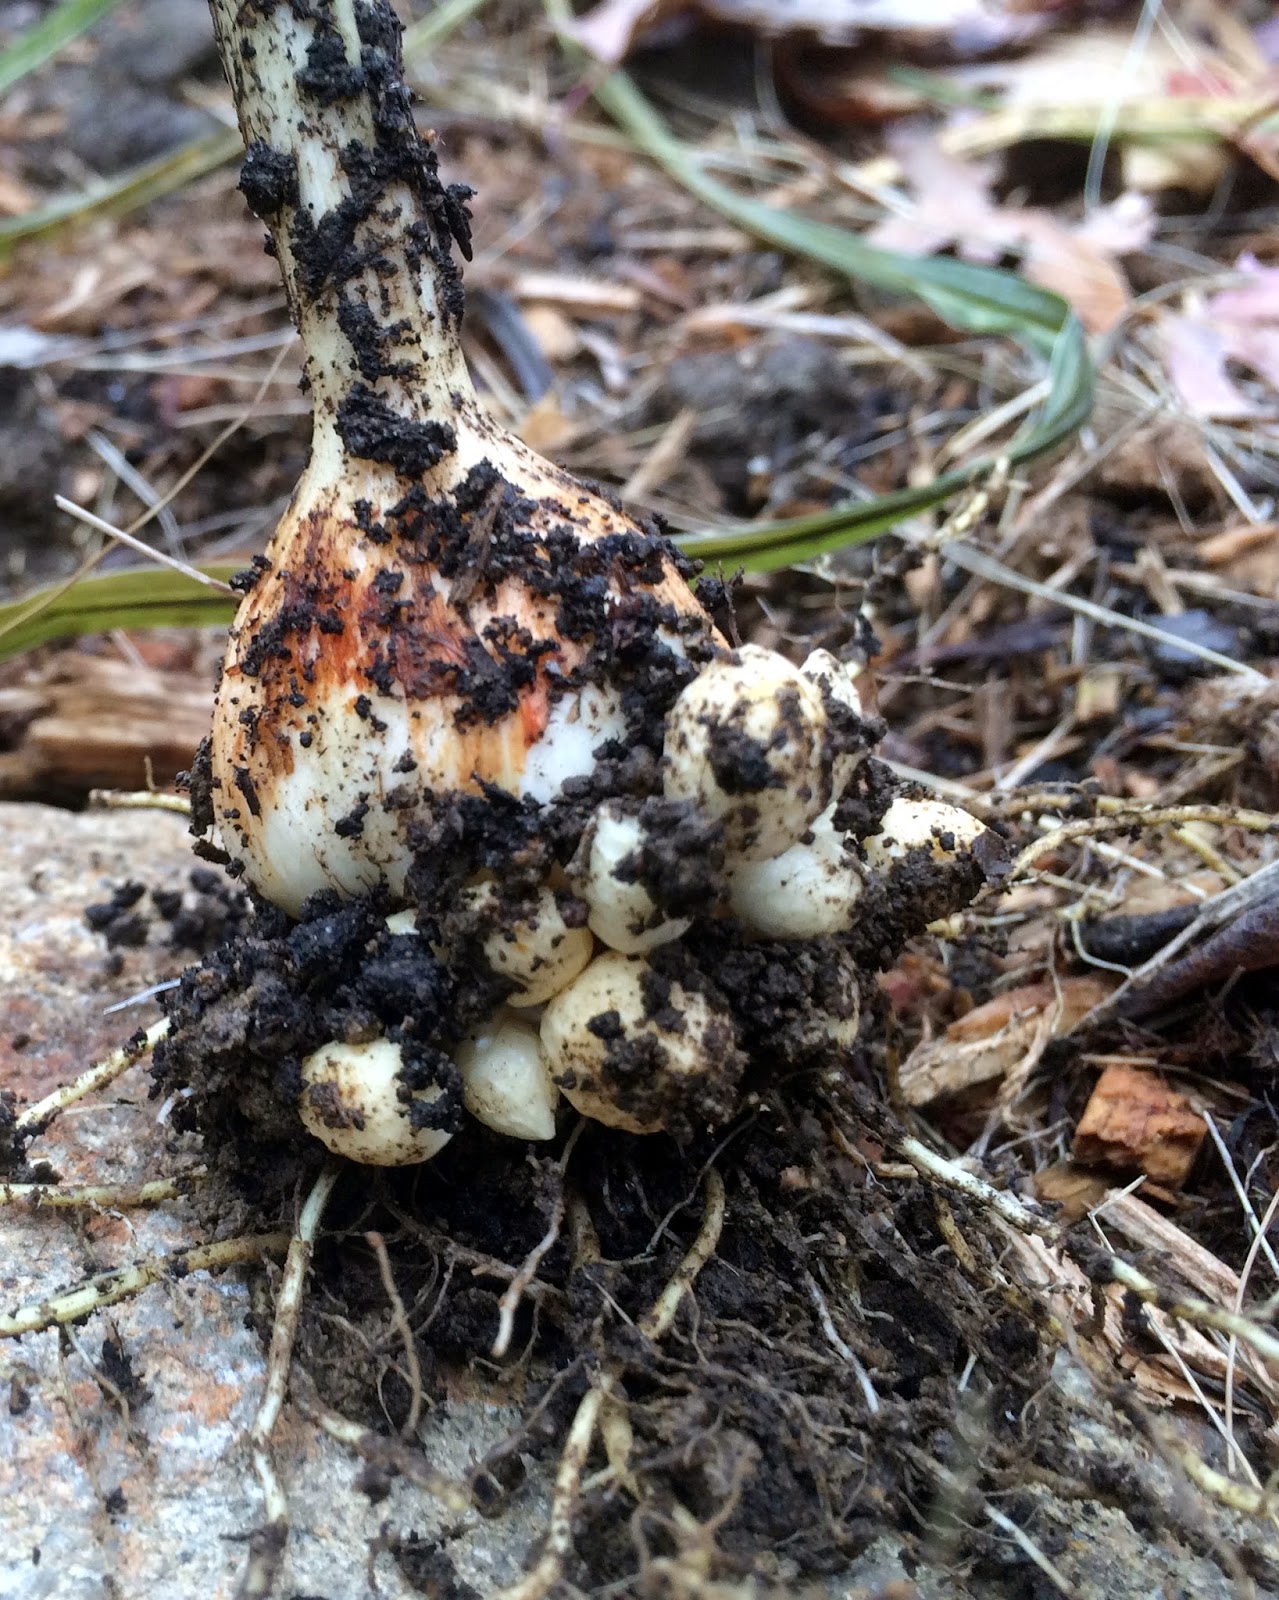
Sometimes those corms will have lots of little baby 'cormlets' on them.  Just separate them gently from the main corm.  You can keep them for planting next year if you like; they will eventually grow big.

a corm with lots of little baby 'cormlets' attached
3.  If your storage area is humid, you might want to dust the bulbs with an organic fungicide.  (I've never done this, though, since my storage area is thankfully pretty dry.)

4.  Store in paper bags or cardboard boxes filled with peat moss, sand, vermiculite, or sawdust.  Gladiolus can just be stored in paper bags or onion bags, or in a box between sheets of newspaper.  For some tubers and corms, such as Dahlias, Foxtail Lilies, and Rain Lilies, the peat moss or other medium should be very slightly dampened, so that they do not completely dry and shrivel up.

Don't forget to label your bulbs!
Just make sure you don't store the bulbs in enclosed plastic boxes or bags, as that will keep in moisture and cause them to rot.

5.  Store in a cool, dry place, around 40 to 50 degrees.  Check on the bulbs a couple times during the winter.  If the bulbs are shriveling up from dryness, give them a mist.  Discard any bulbs that are getting mushy and decaying.

6.  Plant next spring...

Dahlia 'Kelvin Floodlight'
... and enjoy!


Here are a couple other resources that list how to store different kinds of bulbs:
A.D.R. Bulbs: preserving summer bulbs
P. Allen Smith: storing summer bulbs

Wednesday, November 26, 2014

Thanksgiving Started Early

The morning before Thanksgiving, I went to the grocery store to buy some last minute ingredients for our Thanksgiving meal.  However, when I returned home, I found that the feast had already started.


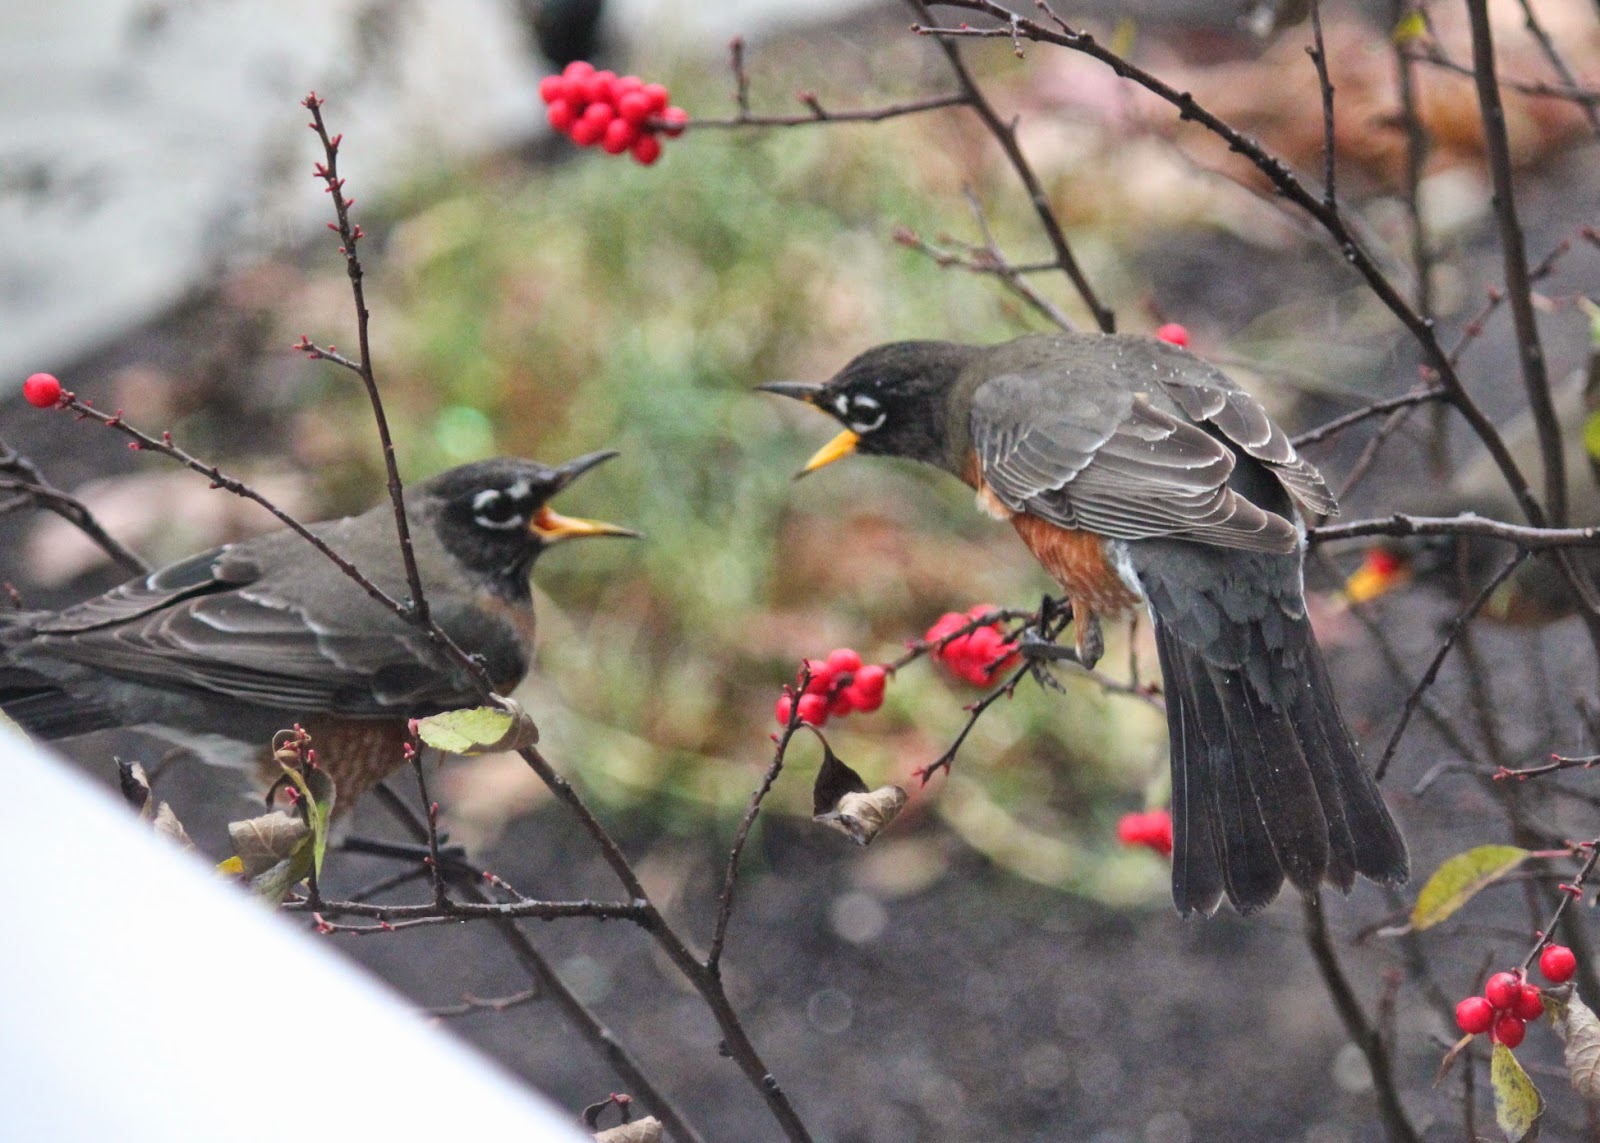
A whole flock of Robins had descended on my Winterberry Holly bushes and were busy gobbling up as many berries as they could get their little beaks on.  
Apparently, the Thanksgiving feast had started early this year.


There must have been around twenty birds on my two little bushes.
Of course, with so much family at the dinner table, there were bound to be a few squabbles.


As much as I couldn't begrudge the Robins their Thanksgiving feast, it was rather sad to see all the berries go even before Christmas.  Last year they were my natural holiday decorations. 

my Winterberries last December
After the horde of Robins left, only a few, sad clumps of berries remained.
What can I say?

my Winterberries this year
I guess the early bird gets all the berries!


For those of you celebrating Thanksgiving, I wish you safe travels, and a warm and happy holiday with your loved ones!  And may all of us be thankful for our blessings.

Monday, November 17, 2014

Insulating and Winterizing the Greenhouse

The temperatures are dropping, and it's time to get my new greenhouse ready for winter!  I'd be thrilled to keep my greenhouse above 55°F (13°C) for the plants that I want to keep in there, but I'd be fine with above 45°F (7°C) with our winter temperatures. We're using a space heater right now to heat the greenhouse, but in order to keep energy costs down, we want to insulate it the best we can.

After researching insulation techniques, here are the things that we did:

1. Insulate the inside with bubble wrap.

We're still working on bubble wrapping the entire thing - it takes awhile!  We used the kind with larger bubbles.


2. Place styrofoam insulation around lower half of the interior walls.

We have wooden walls on the bottom of our greenhouse.  We bought some styrofoam insulation, as well as supplemented with all the random pieces of styrofoam (and boxes of styrofoam bits) that we have been saving.


3.  Fill up large containers with water.

The water helps stabilize the temperatures.  During the day they will warm up, and at night they will release heat.  The more containers, the better!


4.  Stop air from leaking through.

We put foam weatherstripping around the door, since that is where a lot of heat escapes.  I also plan to make a weatherproof cushion to place at the base of the door outside, to further insulate the gap at the bottom of the door.  On the inside, we have a blanket pushed up against the door.


We realized that we had a lot of heat escaping from the foundation of the greenhouse, where the greenhouse meets the base that it sits on.  Since we had already put the styrofoam on the interior, we decided not to spray foam insulation into the cracks (and such ventilation is good in summer anyway.)  Instead we put salt marsh hay (this area's equivalent to pine straw) around the exterior.  It immediately made a difference and helped tremendously in keeping the greenhouse warm.


I do realize we've probably just invited all the mice in the area to come stay in our nice hay filled bed.  Mr. Red House says they'll add body heat and be of help.  I have my doubts about that and just hope that they don't do too much damage to my flower bed.  (My next order of business is looking into rodent repellants!)

The other option I've seen is to dig a trench next to the greenhouse and half bury sheets of styrofoam right next to the exterior for insulation.  After just building a wall around my shade garden, we were not keen on doing more digging, and a trench would disrupt my flower beds, so we decided against it.


I have to give a shout out to Mr. Red House for all his help with the sensors in the greenhouse.  As soon as I talked about wanting a greenhouse, he's been excited to integrate as much technology as he could in there.  One day, thanks to my technology-loving husband, I'm sure I will end up locked in my own house by an evil computer, but other than that I have to admit that technology is very useful. (Don't let Mr. Red House know I think that.)

The sensors Mr. Red House has put in the greenhouse have been immensely handy, as they feed information about the greenhouse status wirelessly to my phone and computer.  For all those techies out there, here is what we have:

top: Aeon Labs MultiSensor
bottom: Smart Sense Multi Sensor
The Aeon Labs MultiSensor senses temperature, humidity, motion, and light levels.  I have it placed next to my plants.

The Smart Sense Multi Sensor is placed near the greenhouse roof and detects when it opens or closes, as well as what the temperature is up near the roof.

The awesome Mr. Red House has also made a nice app displaying my greenhouse stats in real time.  Check it out at the bottom of my blog page!

the display of my greenhouse stats around 1:30pm today
Our greenhouse is coming along pretty well, but I know temperatures will be even colder in a couple months.  If anyone has other ideas about how to insulate greenhouses, I'd love to hear them!

Sunday, November 9, 2014

Fall Projects

Another season, another project here at the Red House Garden!
This fall we decided to tackle an awkward part of the yard - a back corner of the house where the yard slopes.  In order to help this area be less ugly and more usable, we chose to put in a low retaining wall. 


Thanks to interlocking stones available nowadays, this project only took a couple of weekends.  The hardest part was digging and laying the first layer of stones so that they were level.


A bunch of sand, interlocking stones, capstones, landscape adhesive, and two weary backs later...


Ta da!
What was previously an awkward, weedy corner of the house is now going to be my shade garden.


Now I have the winter to think about how to landscape this area - though I couldn't resist browsing for my new garden at the local nursery's end of the season sale.  We found a Weeping Canadian Hemlock and a 'Waterfall' Japanese Maple that just insisted on coming home with us and being planted in the new garden.

beautiful fall leaves of 'Waterfall' Japanese Maple
Fall is a busy season in the garden.  In addition to the rock wall, we are also working to complete our other autumn tasks: bulb planting, garden cleanup, and insulating our new greenhouse


For as we all know, winter is coming...
and there is only so much more time before the snow hits up here in New England!


Friday, October 31, 2014

A Strange Mist Hath Appeared

You might think it was mist floating around my stone bench this Halloween.


But no, 
it's not mist.  
It's no decoration for Halloween.

Anyone want to hazard a guess?


I'll give you a clue - it's plant material of some sort.


My stone garden bench sits near my retention pond, in which there is a good sized clump of cattails growing.  The abundance of whiteness next to my bench is what is probably 
millions 
and millions
of cattail seeds.


They had some help getting there.


If you can imagine two little girls throwing cattail seeds up in the air, making it 'snow', sometimes to the tune of the movie Frozen's 'Let It Go', you will have a good picture of what went on here.


Next year we might have a larger clump of cattails.
Like a whole field of them.

My kids are going to have a ball.

Wednesday, October 22, 2014

Snow-on-the-Mountain

There are a couple different plants that bear the beautiful nickname Snow-on-the-Mountain.  One is the aggressive and often invasive Aegopodium podagraria.  (You might know it by less grand nicknames, such as Goutweed and Bishop's Weed.)  The other is the lovely native annual Euphorbia marginata.

Snow-on-the-Mountain
Euphorbia marginata
This native Snow-on-the-Mountain is very deserving of such a name.  It has little white flowers that bloom in summer and into fall, but what attracts the most attention are its striking, white-as-snow edged leaves.


Snow-on-the-Mountain, is native to much of the continental U.S., and was one of the plants collected by Lewis and Clark on their expedition across North America.  (A specimen believed to be collected by William Clark in 1806 can be found in the Lewis & Clark Herbarium at the Academy of Natural Sciences in Philadelphia.)


This drought-tolerant annual can be grown in sun or partial shade, but it popped up this summer in a fairly shady part of my garden and is doing quite well.  It grows to a height of 2 or 3 feet and is not very picky about soil, as long as it is not too wet.  It has few problems with pests or disease.


I've read that Snow-on-the-Mountain will attract butterflies and smaller bees, but mine mainly seems to attract flies and wasps as its pollinators.  (Aren't I lucky?)


Euphorbia marginata is supposed to be long-lasting as a cut flower if its ends are seared - but it is a cut-at-your-own-risk type of plant.  Unfortunately the stems contain milky sap that can cause a skin reaction for some people (especially those allergic to Latex), so cut stems must be handled with gloves.  Some early cattlemen even used the sap to brand cattle in place of a hot iron. (Yikes!)


Some Native Americans used this plant medicinally.  The Lakotas made a tea out of it to stimulate milk production in new mothers and crushed its leaves to use as a liniment for swelling.  The Kiowa used it as chewing gum, since it forms a type of latex.  It is now considered mildly toxic when eaten, as it is rather purgative.  Deer and other animals generally tend to leave this plant alone.


There are several cultivars of Snow-on-the-Mountain available. It is best to sow the seeds directly where you want the plants or to plant deep plugs, as it doesn't like to be transplanted.  They will then self-seed for the next year.

seed pod forming on Snow-on-the-Mountain
I likely have a bird to thank for my new plant, as it must have popped up from an errant seed.  It grew in the back of my border, behind a tree.  I hope next year I will find a few new plants near the front of the border, where everyone can actually see it!


Happy Gardening!


Today is Wildflower Wednesday!  You can see native wildflowers blooming in other bloggers' gardens at the site Clay and Limestone.